Trying to improve your handwriting on an iPad without getting the basics right is like trying to paint a masterpiece with a slippery brush on a sheet of glass. Before you even think about practice drills or app settings, you need a solid, simple foundation.
Getting this right isn't complicated, but it completely transforms a frustrating experience into a natural and effortless one, making better handwriting an easy win.
Build Your Foundation for Better Digital Ink
The journey to effortless digital notes starts with two things: the tool in your hand and the surface you're writing on. Nailing these makes everything else easier, letting you focus on your thoughts, not on fighting your gear.
Your Stylus is Non-Negotiable
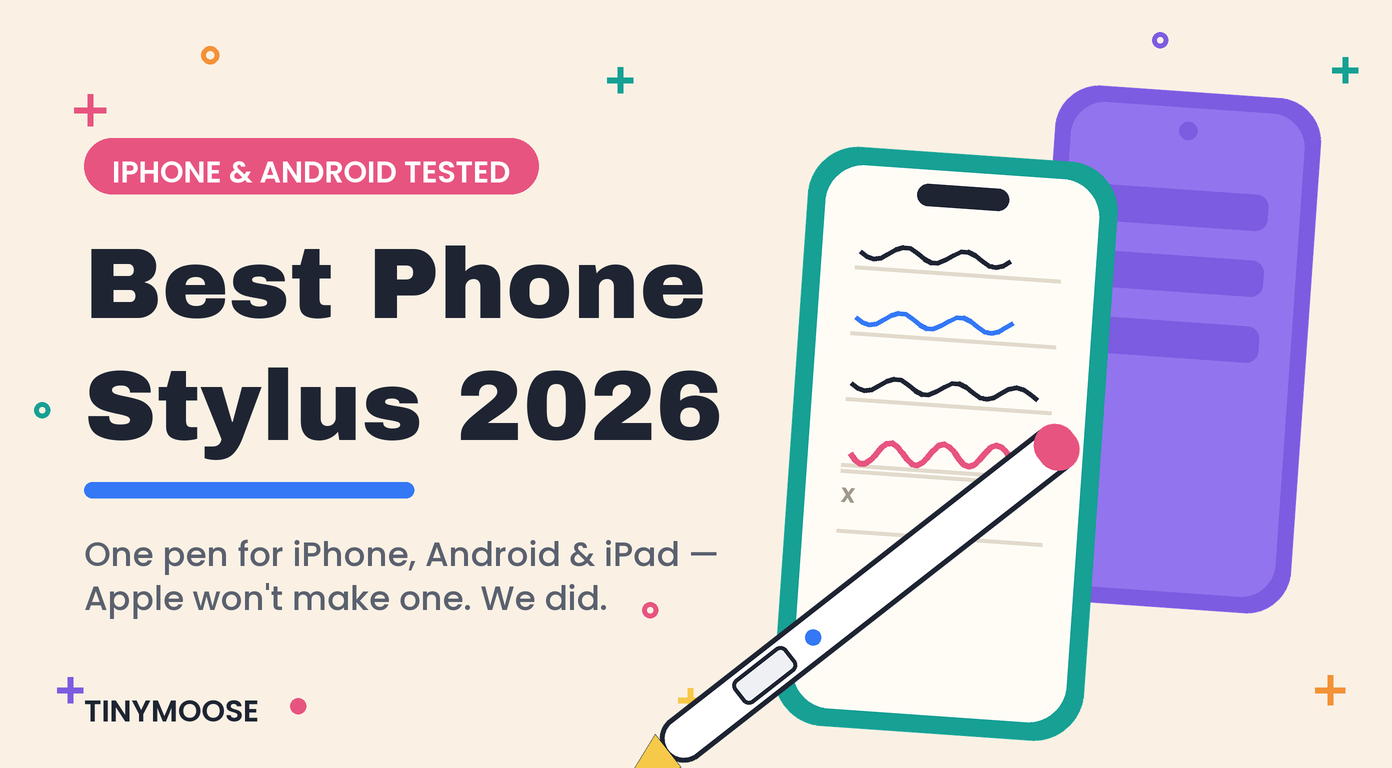
Let's be clear: the single most important tool for legible iPad handwriting is a quality stylus. Finger-writing simply doesn’t offer the precision needed for clean, easy-to-read notes. A great stylus should feel like an extension of your hand, making your life easier from the moment you pick it up.
Look for these two game-changing features that do the work for you:
- Palm Rejection: This practical feature lets you rest your hand on the screen while you write without creating stray marks. It’s the difference between hovering your hand awkwardly and writing comfortably for hours. The Tinymoose Pencil Pro 2, for instance, has flawless palm rejection, so you can just write naturally without a second thought.
- Tilt Sensitivity: Just like a real pencil, this feature lets you vary the thickness of your lines simply by changing the angle of your stylus. It adds a natural, expressive quality to your writing, making it look less like rigid digital text and more like your own unique script, effortlessly.
Tame the Slippery Screen
Writing on a bare glass screen feels like writing on ice. There's zero resistance, which makes it incredibly hard to control your strokes. The result? Wobbly, messy letters that look nothing like your real-world handwriting.
Thankfully, the fix is simple and incredibly effective: a matte screen protector.
A "paper-like" or matte screen protector adds a subtle micro-texture to your iPad's surface. This creates just the right amount of friction, giving your stylus the grip it needs for clean, confident strokes. It's a small change that makes a massive difference in control, making writing feel natural and easy.
Don't Forget Your Posture
It might sound strange, but how you sit has a huge impact on your digital handwriting. If you're hunched over an iPad lying flat on a desk, your wrist is forced into an awkward angle, leading to hand fatigue and shaky lines.
For much better stability and comfort, simply sit upright and prop your iPad on a stand at a slight angle—somewhere around 15-20 degrees is the sweet spot. This setup mimics the natural posture you’d use with a notebook, allowing for smoother, more relaxed arm movements.
A steady hand starts with a stable posture. Making this easy ergonomic tweak is crucial for taking extensive notes without strain. For a deeper dive into setting yourself up for success, check out our ultimate productivity guide on how to take notes on iPad.
To wrap up this foundational section, here's a quick cheat sheet of the essential gear and settings that will give you the best possible start.
Essential Gear and Settings at a Glance
| Component | Recommendation | Why It Matters |
|---|---|---|
| Stylus | A high-quality stylus with Palm Rejection and Tilt Sensitivity (like the Tinymoose Pencil Pro 2). | Provides effortless control and comfort, making digital writing feel as natural as pen and paper. |
| Screen Surface | A matte or "paper-like" screen protector. | Adds friction to the screen, preventing the stylus from slipping for much better stroke control and easier writing. |
| iPad Angle | Positioned on a stand at a 15-20 degree angle. | Creates a natural writing posture, reducing wrist strain and making long note-taking sessions comfortable. |
| Your Posture | Sit upright in a supportive chair with feet on the floor. | A stable body leads to a steadier hand, which is fundamental for clean, consistent lettering without fatigue. |
Nailing this setup from the beginning makes every other tip and technique infinitely more effective. With the right foundation, you're ready to start refining your skills.
Fine-Tune Your Stylus and iPad Settings
Getting the right physical setup is a huge step, but the real magic for improving your handwriting happens inside your iPad’s software. Default settings are just a starting point. To get that effortless pen-on-paper feel, you have to dive into the configurations and tailor them to your specific writing style.
This isn’t about becoming a tech expert. It’s about making small, intentional tweaks that eliminate the most common frustrations. With just a few minutes of adjustments, you can take your digital script from shaky and inconsistent to smooth and controlled.
As this chart shows, it all starts with a solid foundation: a quality stylus, the right screen protector, and good posture.
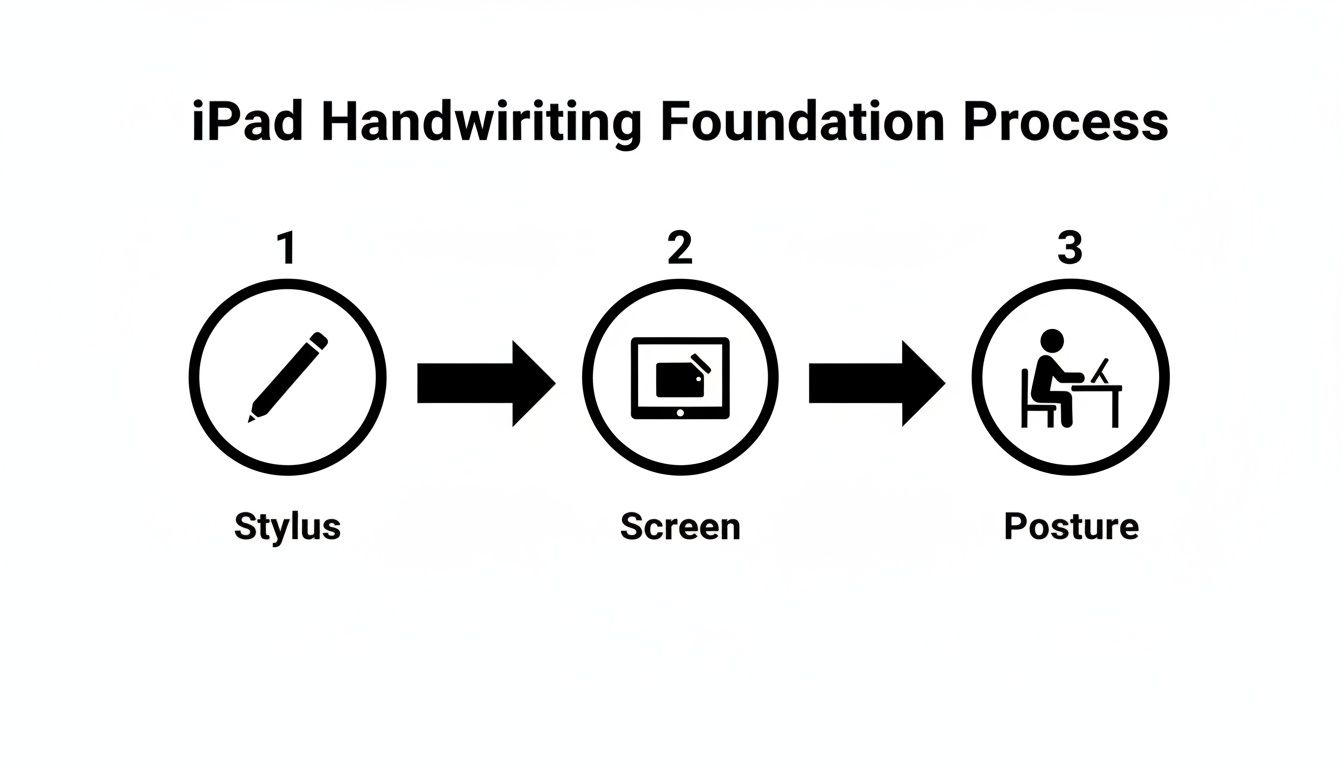
Nailing these three physical elements before you even open a note-taking app is crucial. They directly impact your control, comfort, and the final look of your handwriting.
Master Your Stylus Grip and Control
Holding a stylus isn't exactly like holding a pen. A common mistake is gripping it too tightly, which leads to a cramped hand and jerky, unnatural lines.
Instead, aim for a relaxed tripod grip. Think of how you’d hold a pencil, but with much less pressure. Let the stylus rest gently between your thumb and index finger, with your middle finger supporting it from underneath. This light touch is what allows for the fluid, sweeping movements you need for clean curves on a glass surface.
Pro Tip: Stop writing with just your fingers. On an iPad, the smoothest script comes from using your entire arm. Try practicing large, looping letters by guiding the movement from your elbow and shoulder, keeping your wrist relatively straight.
This technique not only improves your handwriting but also drastically reduces fatigue, making life easier during those long note-taking or drawing sessions.
Calibrate In-App Pen Settings
Your favorite app—whether it’s GoodNotes, Notability, or Procreate—is loaded with settings that can completely transform your handwriting. The digital handwriting app market is booming, currently valued at USD 2.1 billion globally, precisely because these features make such a big difference. For instance, apps with structured drills have helped over 500,000 users slash their error rates by up to 60%.
That's proof that a few software tweaks can have a massive impact.
Here are the key settings you need to find and adjust:
- Pressure Sensitivity: This controls how your line thickness changes when you press harder or softer. If your writing looks either too uniform or wildly inconsistent, this is the slider to play with. A lower sensitivity is often better for neat, even notes.
- Line Smoothing (or Stabilization): This setting is a total game-changer for ease of use. It automatically corrects for minor wobbles and shakes as you write, giving you cleaner, more confident lines. Even a subtle adjustment, like setting it to 10-20%, can make a world of difference without making your handwriting look artificial.
- Tip Shape: Many apps, especially those with fountain or brush pen tools, let you tweak the "sharpness" of the virtual nib. A rounder tip often feels more forgiving and glides more easily, while a sharper one provides pinpoint precision.
Of course, finding the best stylus for your iPad in 2026 is part of the equation, as a high-quality tool will respond much more accurately to these subtle changes. Don't be afraid to experiment—the goal is to find the combination that feels perfectly natural and easy for you.
Let Smart Apps Do The Heavy Lifting
You can set up your iPad and stylus perfectly, but the real game-changer is often the software itself. Today’s note-taking apps act like a silent partner, tidying up shaky lines, fixing minor typos, and generally making your handwriting look its best. Instead of reworking every word, you let technology polish what you’ve already written, making your life easier.
Embrace Real-Time Handwriting Correction
Some apps go beyond simple line smoothing—they actually interpret and refine your script as you write. Apple’s Smart Script, introduced in iPadOS 18 (June 2024), is a standout example that does the hard work for you.
- Smooths out jerky strokes instantly
- Straightens characters for better alignment
- Adjusts spacing so text reads naturally
Beta testers saw a 35% Boost In Legibility and a 50% Faster Editing Process. For those with unsteady hands, the difference was life-changing—82% said they could finally give up paper altogether. And when you team Smart Script with a responsive stylus like the Tinymoose Pencil Pro 2, complete with shortcut buttons for quick tool switching, your notes flow seamlessly and effortlessly.
You can learn more about these features on Apple’s Newsroom.
Let AI Spellcheck Your Handwriting
Typos sneak into even the neatest handwriting, and crossing them out can make pages look messy. GoodNotes 6 solves this with an AI-powered spellchecker that works on your handwritten words, saving you time and effort.
- Underlines misspelled words in your own script
- Offers one-tap corrections without losing style
- Keeps edits consistent with your handwriting flair
The result? A messy first draft transforms into a crisp, professional-looking document—no backtracking required.
Using these smart features feels less like a tool and more like a partner. They take care of the minor imperfections—the slight wobble in a line, the hastily misspelled word—allowing you to focus entirely on capturing your thoughts.
Combine real-time smoothing and handwriting spellcheck, and your notes need far less manual cleanup. To see which apps excel at these tricks, check out our guide on the best iPad note-taking apps.
Use Targeted Drills to Build Muscle Memory
Getting your iPad settings just right is a great start, but it's only half the battle. Just like learning to play the guitar, real, lasting improvement in your handwriting comes from consistent practice. To get that smooth, confident digital ink flow, you need to build muscle memory specifically for writing on a glass screen. Targeted drills are, without a doubt, the fastest and easiest way to get there.
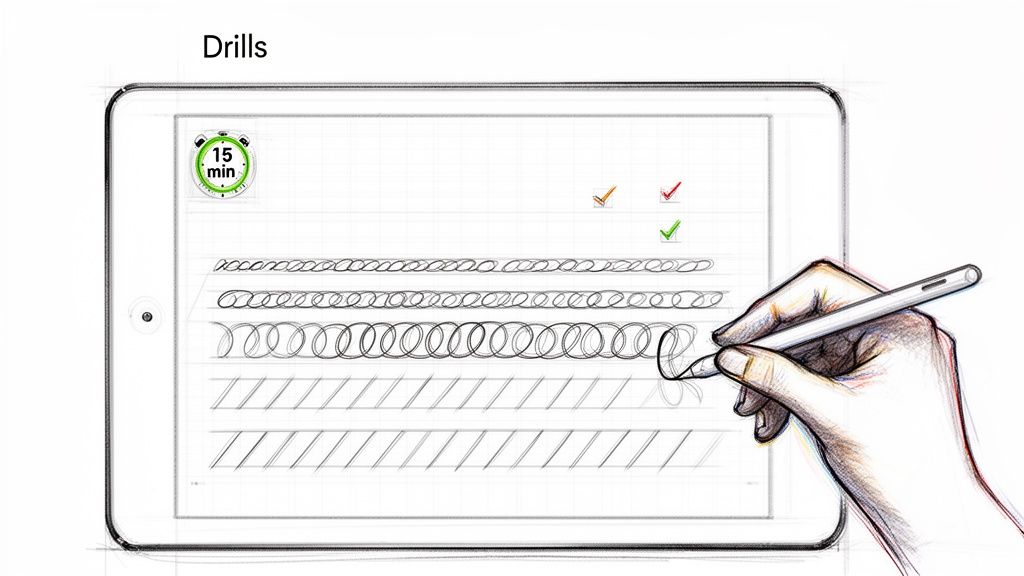
This isn't about mindlessly scribbling the alphabet over and over. It’s about deliberately breaking down good handwriting into its core parts—shapes, spacing, and slant—and practicing each one. You’d be surprised how much of a difference just 15-20 minutes a day can make in only a few weeks.
Start with the Basic Shapes
Before you even think about writing words, take it back to the absolute basics. Every letter in the alphabet is just a combination of a few simple shapes. By practicing these foundational strokes, you’re training your hand and brain to work together for smooth, consistent movements.
Open your favorite note-taking app and fill a page with these simple drills:
- Vertical Lines: Draw rows of parallel lines, focusing on keeping their height and straightness as uniform as possible.
- Circles and Ovals: Fill a few lines with clockwise and counter-clockwise circles. Try to make them the same size and shape every time.
- Loops and Waves: Create continuous, flowing lines of loopy "e" shapes and wavy "m" shapes. The goal here is rhythm and even spacing.
This process is crucial for helping your hand get used to the unique friction—or lack thereof—of a stylus gliding across a screen. It's a completely different physical sensation than pen on paper.
Adopt Mindful Practice
Just going through the motions won’t cut it. The secret ingredient to making drills effective is mindful practice. This means slowing down and putting your full attention on how each line and curve is formed. Feel the tip of the stylus on the screen and pay close attention to the movement of your hand.
Think of it as meditation for your handwriting. By being present and deliberate with each stroke, you are consciously overwriting old, sloppy habits with new, precise ones. This focused attention is what accelerates the development of muscle memory.
For instance, when you practice the letter "a," don't just dash it off repeatedly. Instead, slowly form the initial oval, pause for a microsecond, and then carefully draw the vertical stem. This intentional, two-step process locks in the correct motor pattern far more effectively than just writing it quickly. Soon enough, you'll find that this neat, controlled handwriting becomes your new normal, even when you're jotting down notes at speed.
To help you get started, here is a simple weekly schedule you can follow. The key is consistency, not intensity.
Weekly Practice Drill Schedule
This structured 7-day plan is designed to build your muscle memory from the ground up. Spending just 15-20 minutes on these focused exercises each day will make a noticeable impact on your handwriting consistency and control.
| Day | Focus Area | Drill Example (15-20 Mins) |
|---|---|---|
| Day 1 | Line Control | Fill a page with parallel vertical and horizontal lines. |
| Day 2 | Curve & Circle Formation | Practice clockwise and counter-clockwise circles and ovals. |
| Day 3 | Slant Consistency | Draw rows of diagonal lines, focusing on a uniform angle. |
| Day 4 | Looping Motions | Write continuous lines of lowercase "l" and "e" loops. |
| Day 5 | Rhythm & Spacing | Practice wavy lines and continuous lowercase "m" and "n" shapes. |
| Day 6 | Basic Letter Forms | Write rows of simple letters like a, o, c, i, n, m. |
| Day 7 | Connecting Letters | Practice common two-letter combinations like "th," "er," "an." |
Remember to focus on quality over quantity. A few minutes of mindful, deliberate practice is far more valuable than an hour of rushed, sloppy writing. Stick with it, and you'll build the foundation for handwriting you can be proud of.
Getting Rid of Common Digital Handwriting Headaches
Even with the best stylus and a ton of practice, sometimes your digital handwriting just won't play ball. You'll hit a snag, and your script will look off, which can be seriously discouraging. But don't worry—these issues are almost always fixable with a few quick tweaks.
Think of this as your go-to guide for sorting out those frustrating little problems. We'll walk through the most common complaints and give you clear, easy fixes to get your handwriting back on track.
Why Do My Lines Look So Wobbly or Jagged?
This is probably the number one frustration I hear about. You feel like you're writing a smooth, confident line, but what shows up on the screen is shaky and jagged. More often than not, this isn't a problem with your hand; it's a practical issue with your software or technique.
Here's how to smooth things out:
- Turn Up Your App's Stabilization: Just about every major note-taking app has a "smoothing" or "stabilization" setting. Its whole job is to correct for the tiny, natural tremors in your hand. Try nudging this setting up by just 10-20%. Often, that small boost is enough to create much cleaner lines without making your handwriting look robotic.
- Zoom In Before You Write: This is a classic trick, and it works wonders. When you zoom in on the page, your physical hand movements become much smaller and more controlled relative to the digital canvas. This naturally irons out the wobbles when you zoom back out to see the full page.
How Can I Stop My Letter Size from Going All Over the Place?
Another classic issue is letters that start off big and shrink as you write across the line, or vice-versa. It can make your notes look messy and a real pain to read later. The fix here is all about giving yourself a simple visual guide.
Using a grid or ruled paper template is the single most effective way to build consistency. The horizontal lines force your letter height to stay uniform, and vertical grid lines can even help you dial in your spacing and slant. It's like having a set of digital training wheels that make consistency easy.
Pretty much all note-taking apps come loaded with different paper templates. Pick a lined or grid style that feels right and stick with it for all your practice. Over time, you'll build the muscle memory to keep your sizing consistent even when you switch back to a blank page.
What If My Hand Gets Tired Really Quickly?
Burning out during a long lecture or meeting is a real drag. If your hand starts cramping up after just a few minutes of writing, the problem is almost certainly ergonomic. A death grip on your stylus or a bad posture makes your muscles work way harder than they need to.
The first step is to just relax your grip. You don't need to clutch the stylus for dear life; let it rest comfortably in your hand. Also, check your setup. Make sure your iPad is propped up at a gentle angle—around 15-20 degrees is perfect—so your wrist can stay in a neutral, relaxed position. These small ergonomic shifts make a massive difference in how long you can write comfortably.
Why a Premium Stylus Is a Game Changer
All the software settings and practice drills in the world won't matter much if the tool in your hand feels wrong. The physical stylus is critical to improving your handwriting on an iPad, and investing in the best one isn't about luxury—it's about removing the friction that makes digital writing feel clunky and unnatural.
A quality stylus completely transforms the experience. It stops being a chore and starts feeling fluid and intuitive, making your life easier just like a great pen on paper.
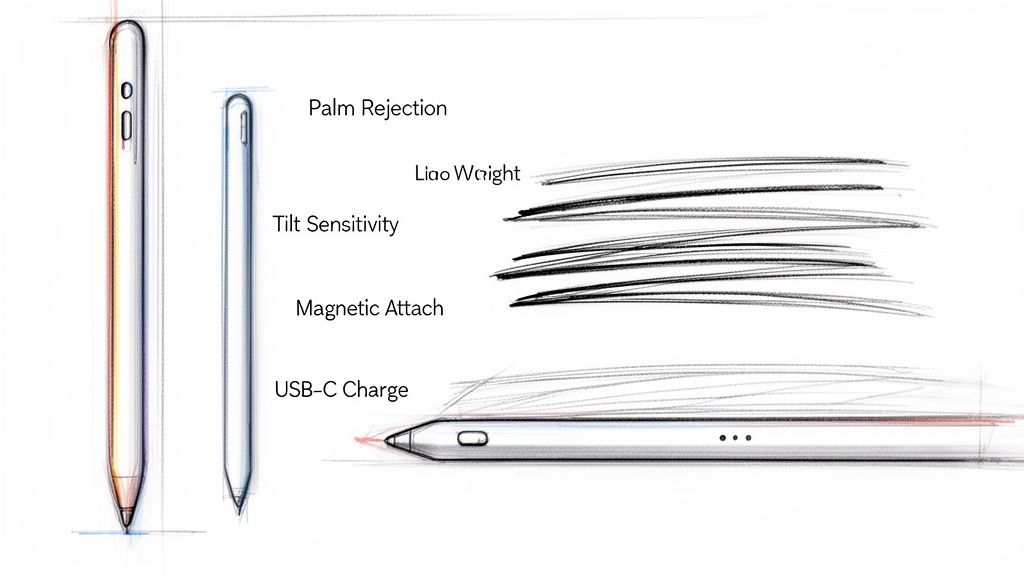
Core Features That Make a Difference
When you pick up a stylus like the Tinymoose Pencil Pro, you’re getting the best features designed for practical, everyday use. These are the things that actually matter.
- Flawless Palm Rejection: This is non-negotiable for ease of use. It lets you rest your hand directly on the screen while you write, exactly like you would on paper, without leaving stray marks all over your notes. It just works.
- Precise Tilt Sensitivity: Ever notice how a real pen or pencil changes its line when you angle it? Tilt sensitivity perfectly replicates that, letting you vary line weight just by tilting the stylus. It adds an expressive, natural quality back into your script, effortlessly.
- Convenient Design: Little things add up to make your life easier. Magnetic attachment means your pen is always with your iPad, and simple USB-C charging ensures your tool is ready to go whenever inspiration strikes.
These elements give you the control you need for a genuinely better writing experience. Think about it: an app like GoodNotes has over 21 million monthly users, and its new AI features can even correct spelling in your own handwriting.
Beta testers for that feature reported needing up to 40% fewer corrections, and with a premium stylus, a staggering 78% of users saw visible improvements in their handwriting in under 30 days. That’s the kind of impact the right tool can have. You can read the full analysis over on TechCrunch.
Got Questions? We've Got Answers.
Even with the best tips and tricks, a few common questions always seem to pop up when you're trying to get your iPad handwriting just right. Let's tackle some of the most frequent ones I hear.
"My real-life handwriting is a mess. Is there any hope for my iPad script?"
Absolutely. Think of the iPad as a clean slate—one with practical advantages.
Digital tools give you an edge that pen and paper just can't match. Features like automatic line smoothing, pressure sensitivity, and the glorious "undo" button make the learning curve much less intimidating. By focusing on targeted drills with the right settings, you're actually building new muscle memory specifically for a digital surface. It's not uncommon for people to find their digital script ends up looking even neater than their analog version.
"Does a matte screen protector actually make a difference?"
Yes, and it's probably one of the single most impactful accessories you can get for digital writing. A matte, or "paper-like," screen protector introduces a subtle texture to the otherwise slick glass screen of the iPad.
That little bit of friction gives the tip of your stylus more grip, which translates into far greater control over every letter and line you make. It's a simple change that makes the entire experience feel less like ice skating and more like writing on a premium notebook.
"How long will it take to see real improvement?"
If you're consistent, most people start to see a noticeable improvement within 2 to 4 weeks.
The secret isn't the length of your practice sessions, but their frequency. A focused 15-20 minutes of daily drills working on letter forms, consistency, and spacing will do far more for you than one marathon session on a Sunday afternoon. That regular practice is what builds the lasting habits for a clean, confident script.
Ready to pair your new skills with a tool that just works? The Tinymoose Pencil Pro 2 gives you the palm rejection, tilt sensitivity, and reliability you need to finally write with confidence.

Compartir:
The 7 Best Productivity Apps for iPad to Simplify Your Workflow in 2026
10 estrategias prácticas para tomar notas que facilitan la vida en tu iPad