The 8:40 train is crowded, the lecture starts at nine, and your iPad is balanced on one knee while you try to get a heading onto the page without it looking like it was drawn with a crayon. Three time zones away, someone at a kitchen table is drafting a client report on the same tablet and has just abandoned sentence four because the on-screen keyboard ate half the display.
Neither of those people has an iPad problem. Both have an accessory problem.
Many iPad owners buy accessories in the wrong order. They start with a case because it looks good in photos, add a cheap stylus from a checkout aisle, then wonder why the setup still doesn't replace paper or a laptop.
The rule that saves money: buy for your exact iPad model and your hardest daily task, not for whichever accessory collected the loudest reviews.
The three that carry almost every workflow come first.
Table of Contents
- Start With the Three Accessories That Cover Most Workflows
- Check Compatibility Before You Buy Anything
- Choose a Stylus and Writing Screen Protector
- Pick a Keyboard That Speeds Up Typing
- Add a Hub Only When You Need Ports
- Match Your Kit to Your Workflow and Order
Start With the Three Accessories That Cover Most Workflows
If you can buy only three things, buy these three: a stylus, a keyboard with a trackpad, and a screen protector made for handwriting. A kit built around the Pencil Pro, the SpacePad keyboard, and a writing-focused film on the glass covers all three. Together they fix what an iPad struggles with out of the box: precise input, sustained typing, and a surface that doesn't feel like ice under a plastic tip.
The keyboard case is the easiest to argue. Reed College's iPad study found that participants named the keyboard the device's greatest shortcoming for academic work, calling the soft keyboard awkward, especially in portrait orientation, and many avoided writing anything longer than a brief email. Most of those students used the iPad mainly to annotate texts outside class rather than take lecture notes or compose papers, and several said they wanted to write directly on the screen. Glass handles quick replies. It does not handle essays.
The stylus side shows up in spending too. Stylus pens represented 21.3% of the global mobile-device precision-accessories market in 2025, with an estimated market value of $2.73 billion, according to Dataintelo. People keep buying pens because a pen solves the one task nothing else in the kit can touch.
The three roles, in plain terms
- The stylus handles marks. Lecture notes, PDF annotations, sketches, signed forms, diagram labels. Anything where the shape of your handwriting carries meaning.
- The keyboard handles volume. Reports, essays, long email, spreadsheets, plus the shortcuts that move you between apps without touching the glass.
- The protector handles feel. The film under the tip decides whether handwriting feels controlled or skates. It's the cheapest part of the kit and the one that changes the most.
Here's how the starter kit looks side by side.
| Accessory | Who it helps most | What to check first |
|---|---|---|
| Pencil Pro | Students, artists and note-takers | Palm rejection, tilt support and compatibility with your exact iPad model |
| SpacePad keyboard | Students and remote workers who type daily | Exact iPad model fit and trackpad navigation |
| Writing screen protector | Anyone who handwrites on the glass | A matte, writing-focused surface that suits how you use the stylus |
Look at that last column again. Model fit and daily task come before everything else. A pen that pairs and charges with your iPad beats a pricier one your model can't use.
So start with whichever of the three solves your hardest daily task. If you write by hand every day, the stylus and protector come first. If you type every day, the keyboard does. Add the rest when a real gap appears, not because a list told you to.
Check Compatibility Before You Buy Anything
Buying by screen size is how people end up with a stylus that won't charge and a keyboard case that won't close properly. Screen size tells you nothing about generation, and generation is what decides fit.
Apple's guide to Apple Pencil compatibility shows just how fragmented this gets: Apple Pencil (1st generation), (2nd generation), and USB-C each support different combinations of iPad, iPad Air, iPad Pro, and iPad mini models. Apple also notes that the USB-C Pencil requires iPadOS 17.1.1 or later. So the best-reviewed pen on the shelf can be the wrong pen for your tablet, and no amount of review-reading will tell you that.
Correct beats premium. A pen that fits your model, charges from your port, and supports the features you actually use will outperform a more expensive one that can't do any of those things.
Six checks, in order
- Read the model name. Settings, then General, then About. Write it down exactly as it appears.
- Match the generation. Use the model number or the product listing, not the screen size. "iPad Air" alone covers several generations with different accessory support.
- Check the charging port. USB-C and Lightning accessories need different connections, so this single detail rules pens in or out.
- Confirm the Pencil type. Some iPad generations support only certain Pencil types, which decides pressure, tilt, and magnetic charging.
- Check the iPadOS version. Open Settings, then General, then Software Update, because the USB-C Pencil needs iPadOS 17.1.1 or later.
- Compare the keyboard listing by exact model. Case dimensions and connector placement decide whether a keyboard attaches and closes cleanly.
We ask customers to select their exact iPad model when ordering the SpacePad keyboard for exactly this reason. It's a thirty-second step that prevents a return.
The traps are predictable. Someone buys a refurbished iPad and knows the screen size but not the year. Someone buys a gift and knows it's "the big Pro" without knowing which generation. Someone assumes an 11-inch Pro from one year takes the same accessories as an 11-inch Pro from another. If you're weighing generations against each other, the Tinymoose Apple Pencil comparison guide breaks down which pen suits which model before you spend anything.
| Check | Where to find it | Why it matters |
|---|---|---|
| Model name | Settings, General, About | Screen size alone does not identify the generation |
| Generation | Model number or product listing | Stylus and keyboard fit depend on the generation |
| Charging port | The iPad's connector | USB-C and Lightning accessories need different ports |
| Pencil type | Apple's compatibility list for your model | Some generations support only certain Pencil types |
| Keyboard fit | The keyboard listing for your exact model | Case dimensions decide whether it attaches |
| iPadOS version | Settings, General, Software Update | The USB-C Pencil requires iPadOS 17.1.1 or later |
Save that table before you order. It's the difference between one purchase and one purchase plus a return.
Choose a Stylus and Writing Screen Protector
Bare glass is a bad writing surface, and anyone who has tried to take notes on an iPad knows it within a minute. The tip skates, your letters get rounder and sloppier, and your hand starts making tiny corrections you don't notice until your forearm aches.
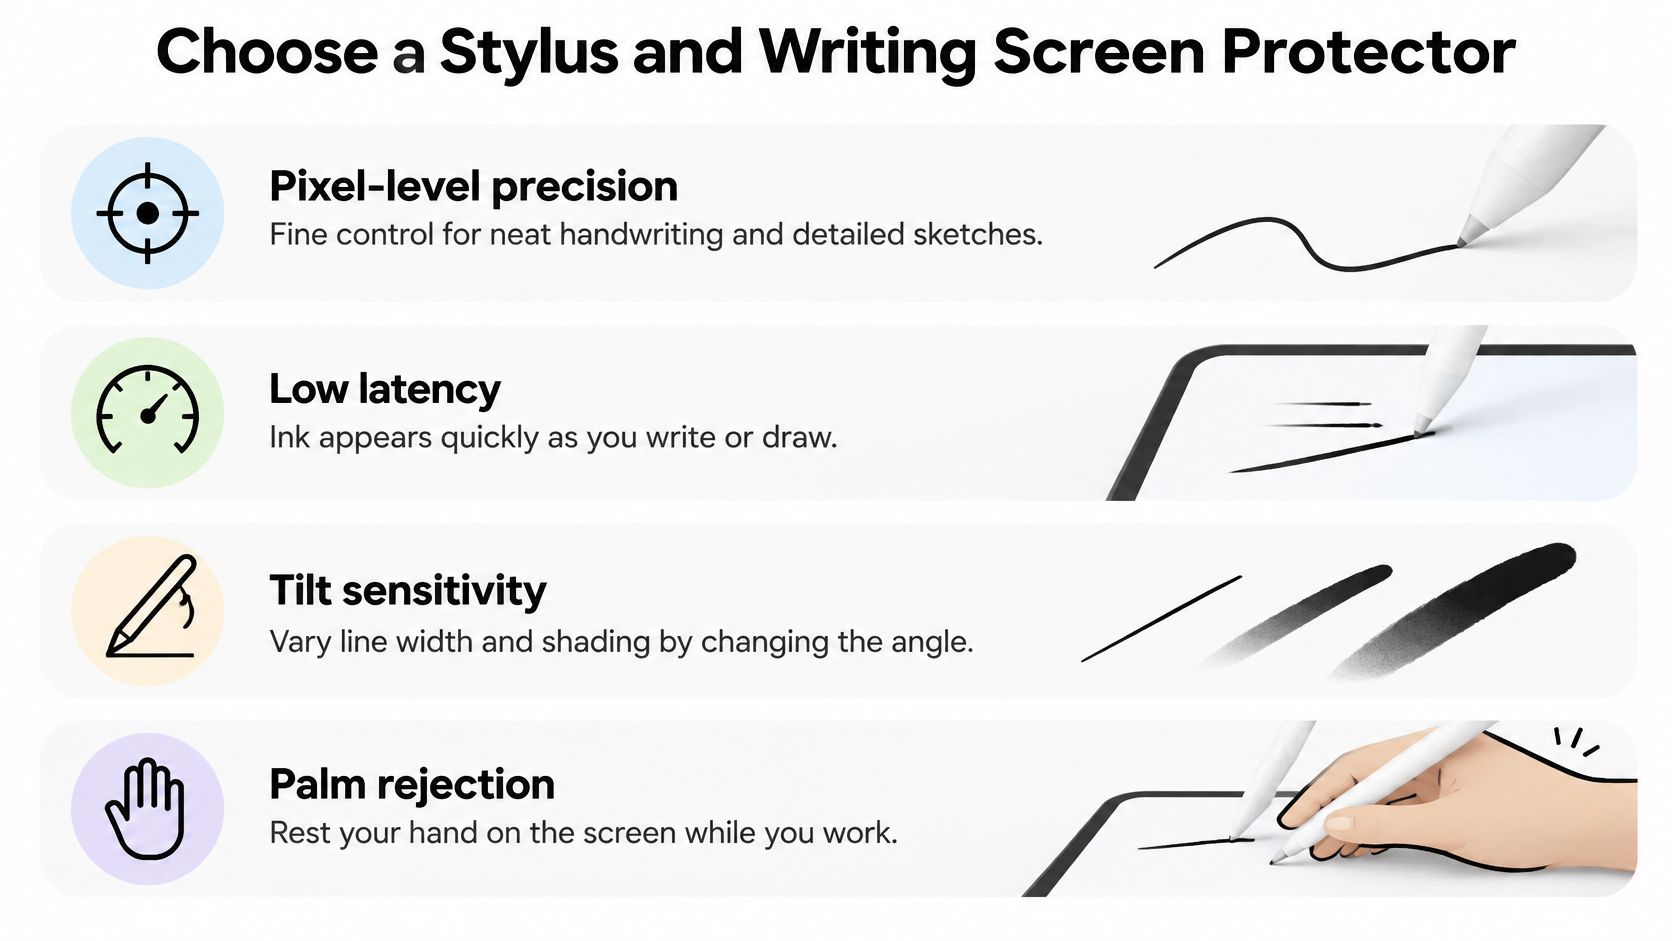
Palm rejection is what fixes the first half of that. Without it, you hover your hand like you're defusing something. With it, you rest your wrist on the screen the way you would on paper, and the iPad ignores everything except the tip. Ask anyone who writes on an iPad daily what they'd give up last, and it's palm rejection. Note-takers notice it before anything else, and it's the single feature that separates a usable pen from a frustrating one.
Apple's overview of Apple Pencil names the four mechanics that decide whether digital handwriting feels natural: pixel-level precision, low latency, tilt sensitivity, and palm rejection. Tilt changes shading and other stroke effects, so angling the pen lightens or widens a line. Pressure can vary a mark from light to deep. Apple Pencil Pro adds a double-tap control for switching tools, which keeps you inside the task instead of reaching for an on-screen menu mid-sentence.
Tilt, hover and the shortcut button
Hover is the feature buyers forget to ask about and then use constantly. On supported iPads you can hold the pen up to 12 millimeters above the display to preview where it will touch, and in compatible apps the preview shows the expected tool, color, line thickness, and opacity before you commit a mark. Apple's guide to hovering with Apple Pencil also notes that tilt and lateral angle can affect the preview in Notes and drawing tools. For detailed work that's the difference between placing a line and hoping.
Then there's readiness. A pen that's always charged is a pen you use, so check the charging method before you buy: some models charge over USB-C, others charge wirelessly when magnetically attached to the iPad's side. Magnetic attachment doubles as storage, keeping the pen paired and stuck to the edge instead of rolling around a bag.
The writing screen protector finishes the job. A matte, writing-focused film adds friction so strokes feel intentional, and it takes the shine off the glass that makes a tip slide. Choose based on how hard you press and how much texture you want, and read up on the trade-offs in clarity and nib wear before you pick a film, because a rough surface that eats tips is worse than no protector at all.
| Feature | Why it matters | What to look for |
|---|---|---|
| Palm rejection | Lets you rest your hand on the screen while writing | Reliable rejection in notes apps and drawing apps |
| Tilt sensitivity | Changes shading and line character | Smooth response to angle changes |
| Hover preview | Shows where the tip will touch before you mark | Support on your iPad model |
| Shortcut control | Switches tools without leaving the task | A button or double-tap you can use without looking |
| Charging method | Keeps the stylus ready every day | USB-C charging or magnetic wireless charging on the iPad side |
| Magnetic attachment | Keeps the stylus paired and stored | A strong magnet that holds it on the iPad edge |
Students who write by hand need palm rejection first. Creators need tilt first. Everyone needs the protector that matches how they write.
Pick a Keyboard That Speeds Up Typing
Here's the test that settles it in five minutes. Type a full paragraph, then move between three apps using only the trackpad. If either step feels like a workaround, that keyboard is wrong for you, no matter how good it looks folded shut.
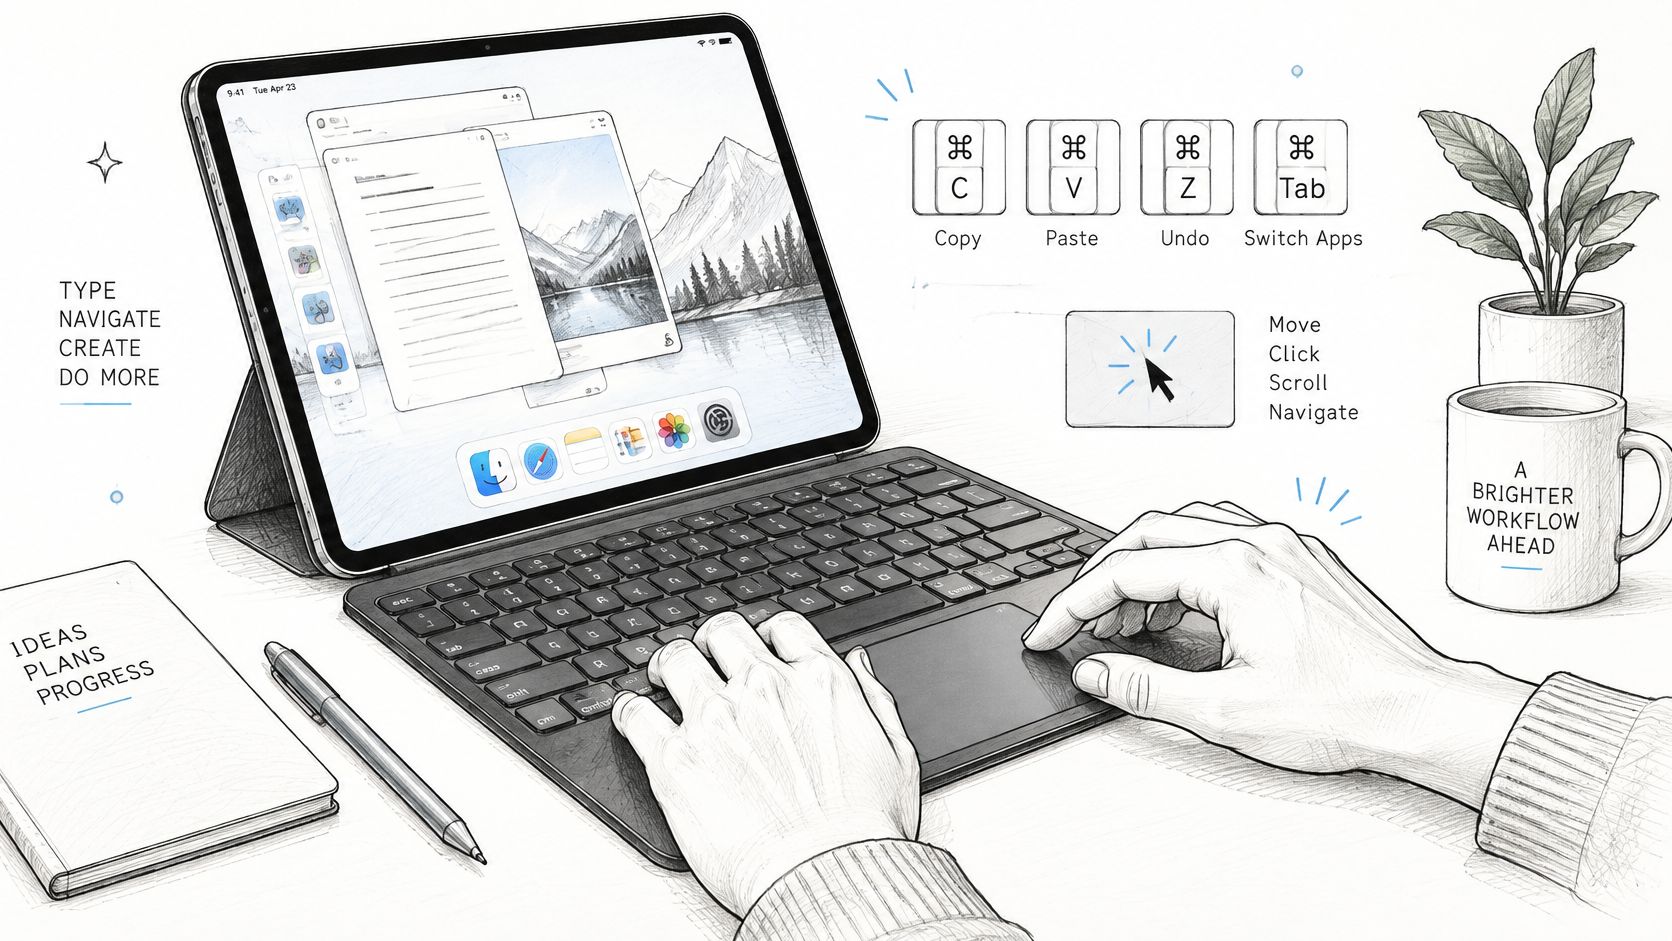
Typing speed is the smaller half of the benefit. A keyboard with an integrated trackpad changes navigation, because iPadOS supports pointer control alongside text entry. Apple's iPadOS guide to keyboards and trackpads documents that compatible keyboard-trackpad combinations require iPadOS 13.4 or later, which lets the trackpad control items on screen while the keyboard handles typing. Apple's developer guidance also recommends Full Keyboard Access, which allows navigation and activation of windows, menus, controls, and system features using only a keyboard.
That combination produces the effect people want. You move between a text field, a control, and another app without lifting a hand off the keys, which is what makes an iPad feel like a workstation instead of a tablet with a stand.
The four things to check
- A stable hinge or stand. If the screen wobbles while you type, you'll stop typing on it.
- A precise clickable trackpad. Dragging a text selection on a mushy trackpad is slower than reaching for the screen, which defeats the point.
- Dedicated shortcut keys. Home, brightness, and media keys save a reach for the Control Center every few minutes.
- Confirmed model compatibility. A keyboard that fits physically but lacks reliable iPadOS shortcut support slows you down in document editing, research, and multitasking.
Screen space matters as much as key feel. In a study of 42 Grade 7 students' iPad writing, 22 students said typing let them write faster, while five reported that the on-screen keyboard occupied enough display space to push content out of view and force extra scrolling. Thirteen students associated iPad writing with longer texts, and nine linked that to keyboard affordances making writing less laborious. A physical keyboard gives you back the bottom third of the screen.
| Setup | Best for | Trade-off |
|---|---|---|
| Keyboard with trackpad, such as the SpacePad Pro | Students and remote workers who want laptop-style navigation and good value | Confirm exact model fit before ordering |
| Premium first-party keyboard | Buyers who want a design matched to Apple hardware and do not mind paying more | Higher cost for the same typing task |
| Typing-only folio | Light note-takers who mostly annotate PDFs | No trackpad, so navigation depends on touch |
The SpacePad Pro wins for most students and remote workers because it covers the practical middle: comfortable typing, a detachable magnetic design that travels easily, a three-way multi-touch trackpad, and laptop-style navigation without premium-brand pricing. If you want a keyboard finished to match Apple's own hardware and cost isn't the constraint, the first-party option is a fair choice for a different reason.
Whichever you pick, learn the how iPad trackpad gestures work basics in the first week. Two-finger scrolling, three-finger swipes between apps, and a click-drag selection are what turn a keyboard case into a work machine.
Add a Hub Only When You Need Ports
You're in a conference room with an HDMI cable in your hand and the projector is asking for a signal. That's the moment a hub earns its place, not the day you buy the iPad.
Compatible iPads output video through the DisplayPort protocol, and the ceiling depends on your model. Apple's support documentation on external displays for iPad specifies support for one external display up to 4K resolution at 60 Hz on iPad (A16), while selected iPad Pro and iPad Air models support external displays up to 6K, and some Pro and Air models also support Thunderbolt displays.
The resolution you get is set by both ends of the cable. Apple recommends a high-bandwidth USB-C cable for high-resolution displays, and HDMI, VGA, and DVI connections each need an appropriate adapter. Buy a hub that matches your iPad's port standard and your actual workload rather than assuming every USB-C accessory delivers identical video output.
Then there's the limit almost nobody mentions. On iPad (A16), USB-C data transfer is considerably slower than a fast internal drive, so pushing a large video or photo library through a hub takes time. That's fine for a card of documents and painful for a shoot.
| Need | Requirement | Check before buying |
|---|---|---|
| Projector or external monitor | iPad (A16) supports one external display up to 4K at 60 Hz | Confirm whether you need an HDMI, VGA or DVI adapter |
| 6K external display | Selected iPad Pro and iPad Air models | Check your exact model first |
| Thunderbolt display | Some iPad Pro and iPad Air models | Match the hub to the port standard |
| Large photo or video transfers | iPad (A16) USB-C data transfer is considerably slower than a fast internal drive | Expect slower copies and plan transfers accordingly |
| High-resolution desk monitor | Apple recommends a high-bandwidth USB-C cable | Use a cable rated for high bandwidth |
The pattern across the table is the point: every row hinges on your exact iPad model and a named task. A hub bought "just in case" usually covers ports you never use and misses the one adapter you need. Buy a hub for a specific display or port task. If you can't name the task, you don't need the hub yet, and it'll sit in a drawer with the cable you can never find.
Match Your Kit to Your Workflow and Order
Every accessory adds capability. Every accessory also adds weight to the bag, thickness to the stack, and one more thing to charge. Apple's guide to using a hardware keyboard with iPad illustrates the trade neatly: a keyboard can control the system through Full Keyboard Access and shortcuts, but you have to configure the assistance and learn a separate set of controls first. The benefit is real, and so is the cost.
So weigh any addition in five numbers before you buy it.
Weigh it in five: total carry weight, packed thickness, charging burden, lap stability, and the seconds it takes to switch between typing and handwriting.
What extra gear actually costs you
The failure modes are boringly consistent. A keyboard case that's excellent at a desk makes one-handed reading awkward in bed. A stand that holds a drawing angle perfectly owns a permanent corner of the desk. Separate pieces multiply: a pen here, a cable there, a dongle in a different pocket, three things to charge instead of one. None of that shows up in a review. All of it shows up in week three.
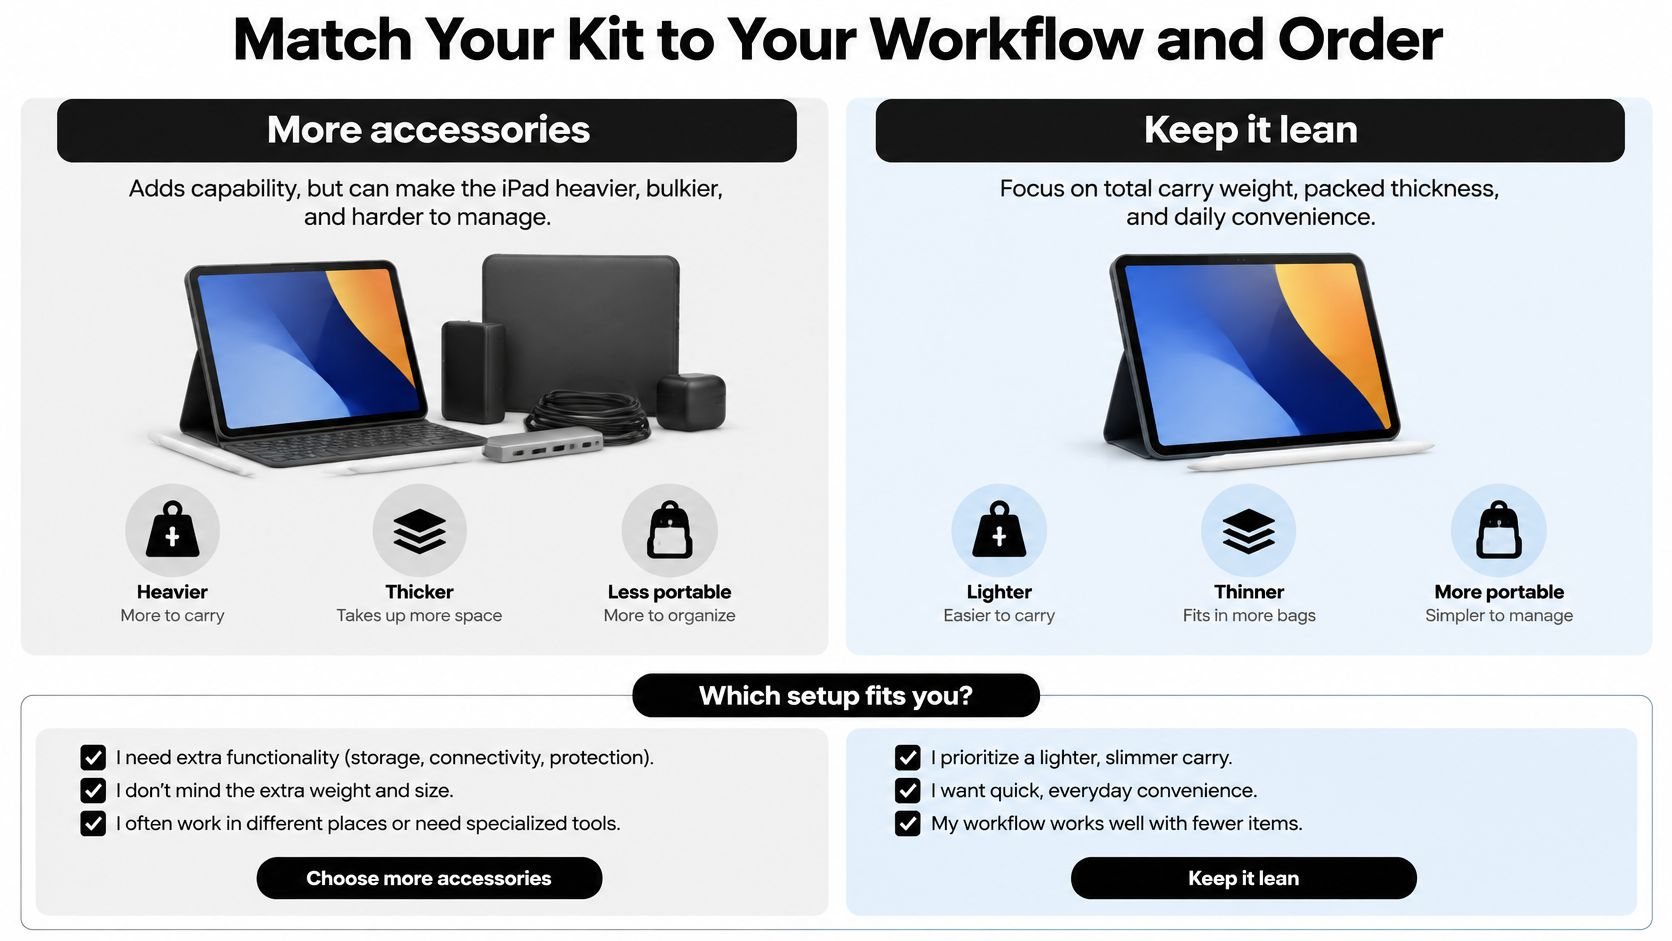
The contrarian call is to buy less. A student who spends most sessions annotating PDFs gets more from a lightweight folio and a good stylus than from a keyboard case, because the case's typing benefit never gets used and its bulk gets carried every day. A remote worker who drafts documents for four hours a day gets more from a compact keyboard plus an adjustable stand than from a permanently attached case, because the stand can be left on the desk and the iPad undocked in seconds.
Core kit by use case
| Use case | Core kit | Trade-off to check |
|---|---|---|
| Handheld note-taking | Stylus and a light folio | A case may block magnetic attachment of the stylus |
| Desk writing | Keyboard with trackpad and an adjustable stand | The stand takes desk space |
| Travel | Compact keyboard and stylus, no hub | More small items to charge and keep track of |
| Presenting or external monitor | Hub, stylus and cable | The adapter adds weight and another cable to pack |
Handheld note-taking is the case worth thinking hardest about, because a folio wrapping the iPad's side edge can block the magnet that holds and charges the pen. Check that the case leaves the attachment edge open, or you'll be taking the case off every night. Desk writing rewards a keyboard you'd happily type on for an hour, and travel rewards anything that survives a bag without adding a charger.
Order in four steps
- Confirm the model. Settings, General, About, written down exactly. Everything after this depends on it.
- Choose the stylus for your main task. Our stylus range covers every iPad model that supports Apple Pencil, including iPad Pro 11-inch, iPad Pro 12.9-inch (3rd generation and later), iPad Pro 13-inch M4/M5, iPad Air 4th generation and later, iPad mini 6th generation and later, and standard iPad 6th generation through the current A16 model. The listing for your model is still the final check.
- Add a keyboard with a trackpad if you type daily, and confirm its exact model fit. Because we sell both the keyboards and the pens, they're designed to work together smoothly for portability and productivity.
- Buy a hub only when a named display or port task requires one. Otherwise skip it and spend the money on the screen protector, which you'll feel every single day.
The best kit isn't the biggest one. It's the one you use on an ordinary Tuesday without thinking about it.
Confirm your iPad model first, then pick the pieces that match the work you do. Tinymoose sells the Pencil Pro stylus with palm rejection, tilt support, and shortcut buttons, plus the SpacePad iPad Keyboard with a 3-way multi-touch trackpad, detachable magnetic design, and up to 200 hours of working time on a single charge. Because the same store supplies both, you can order a pen and keyboard that are designed to work together for portability and productivity rather than gambling on two unrelated pieces. Browse the range once you've written down your exact model, and you can build a working iPad setup in three purchases rather than ten.
Share:
Paper Feel Screen Protector: Benefits, Limits and Choice